Most of our houses are stuffed to the gills with electronic products. We live in the digital age, and mobile phones, tablets, headphones, CDs, cordless phones, wireless routers, laptops, wireless keyboards, computers, e-readers, are an integral part of our lives. But many of these items have a typical life of five to six years at most. Then what happens to these things?
We get rid of them and they contribute to rising amounts of e-waste. The municipal corporation in Bombay is struggling with waste management and requires citizens to separate their garbage, if they want it to be collected. E-waste is to be disposed of separately, because parts of it can be recycled, and some of it could be dangerous. This article gives some useful information on the disposal of e-waste in India.
My daughter's school has started educating them about e-waste. To add a creative and fun component to this learning experience, the kids have been asked to work with their parents to try and create something useful or artistic using e-waste.
When I first saw the circular from the school, I was quite annoyed. The schools nowadays assign way too much home work for parents. I belong to the unlucky generation, that has had to do loads of homework as a kid, as all homework then was for kids alone, and now all over again as a parent. Schools have decided not to burden kids with homework anymore, but they can't stop giving homework out of habit, and so they give it to us parents.
To be fair, this was an optional project. I try to keep an open mind, so I gathered all the electronic junk I could find, which included an old land line phone that doesn't work any more, a bunch of wires, screws, used batteries and an old computer mouse. Then I stared at the junk pile, wondering why I had been hoarding it, and what I could possibly do with it. I couldn't think of anything, but my daughter was eager to paint the computer mouse, and I let her. She painted the body brown and added eyes to make it look like a field mouse.
After that I decided to open up the cordless phone, so my daughter could examine it's innards. While opening up the phone, we took out loads of tiny screws, and that gave me an idea. The screws were shiny and would make a beautiful necklace, but sticking them to a wire or thread would be clumsy.
Then I thought of tying them with wool, like I have shown in the picture below.
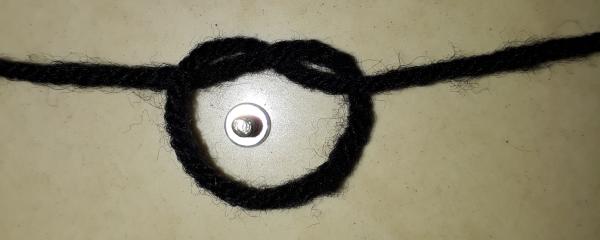
After tightening the knot and tying another one to make sure it doesn't unravel, it looks like this.
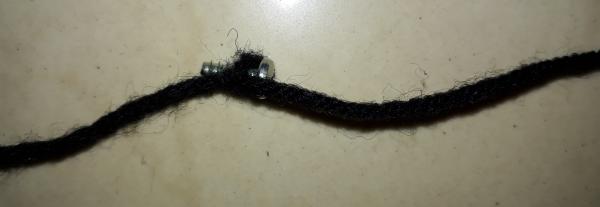
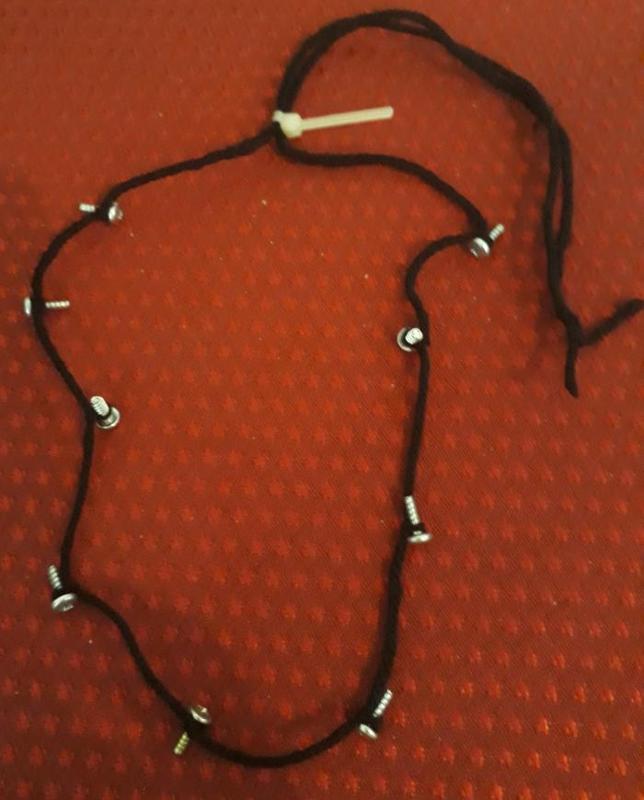
The above pictures are only for demonstration. For the necklace, I used a much longer piece of wool and tied several screws at regular intervals. Then I used a cable tie to bring the two ends together. The cable tie can be pushed up and down the length of the wool, making the length of the necklace adjustable.
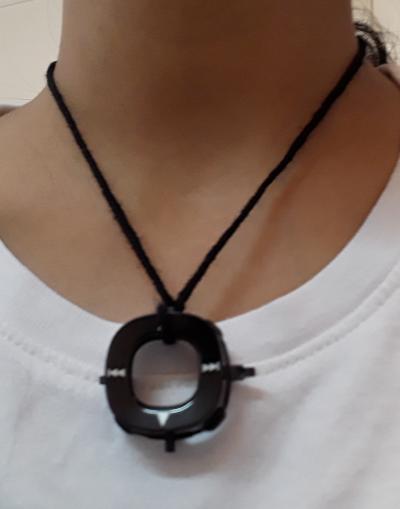
My daughter really liked the navigation button on the phone and asked if we could use it for something. To me, it looked a lot like a pendant, and so we made another necklace.
After that, I wondered what I could do with the other pieces. My daughters and I played around with the pieces for a while. My older daughter was curious about the printed circuit board (PCB) of the phone, and in showing it to her, I noticed some neat round holes near the corners, and that gave me the idea of making a scratch pad.
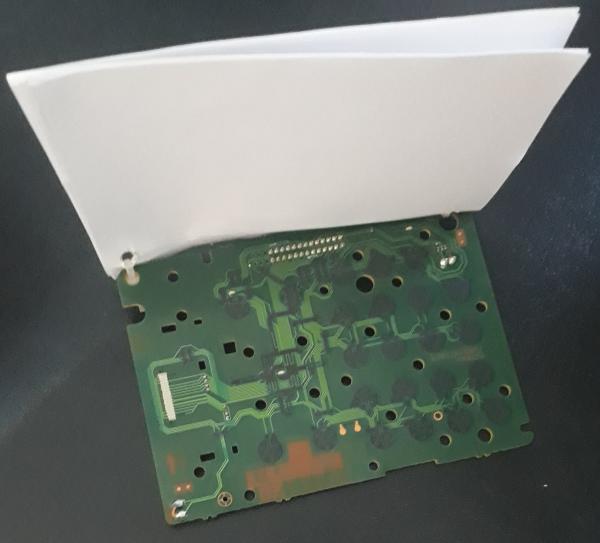
I cut a stack of paper, to the size of the PCB. My daughter loves using the punch, so I marked out the places, where I needed holes, and she punched them. You can write comfortably only on one side of such a pad, so I mostly used discarded paper, printed on one side.

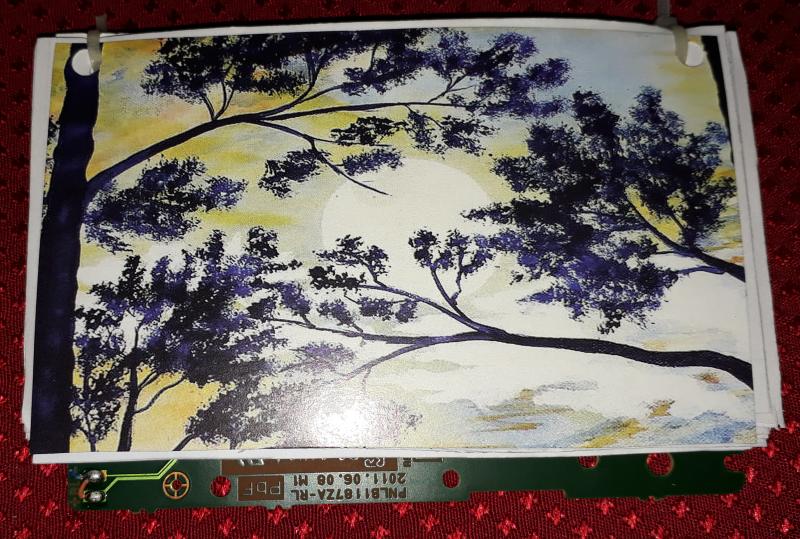
I found an old postcard no one was using, but had a lovely picture. I cut it to the right size, keeping the best parts of the picture, and used it as the cover page. I aligned the holes on the postcard, stack of papers and PCB and pushed cable ties through. My daughter tightened them and the pad was ready.
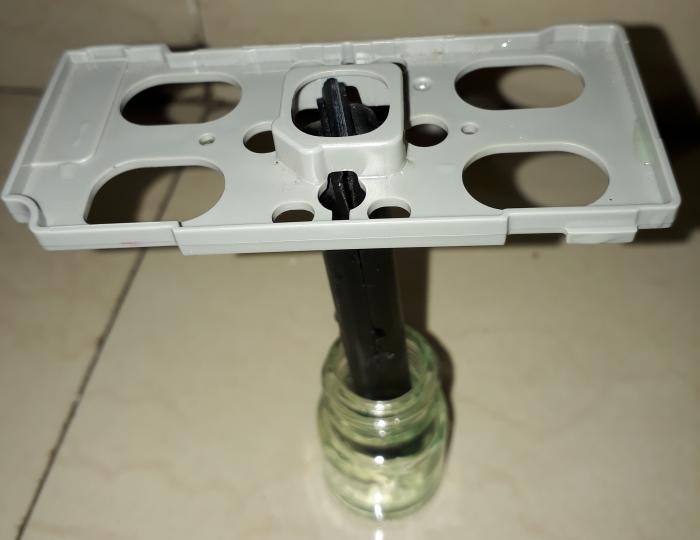
That's when I saw a grey plastic piece, on which the menu buttons of the phone had been fixed. The holes seemed prefect for a toothbrush stand, if only they were a little elevated. I found a broken clip for food packets, twisted off one end, that was sticking out with a pair of pliers, and then used it to elevate the plastic piece, and voilà, we had a toothbrush stand. the bottle in the picture below is am empty poster colour bottle.
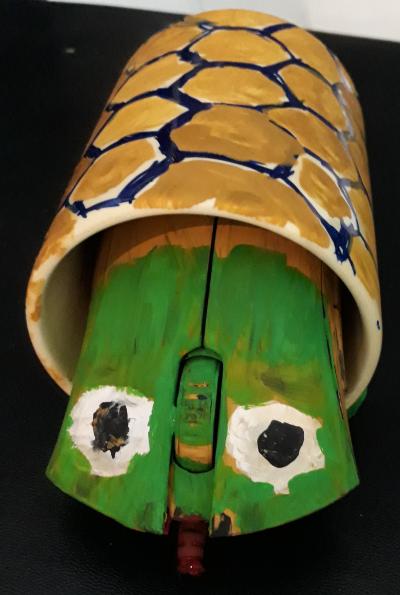
While my older daughter and I were busy with the project, the younger one was getting bored. She had found the mouse the older one had painted, and shoved it in to a cup. The odd sight reminded me of something, and it took me a moment to realize, that it looked like a tortoise. So I found a cup whose handle was broken, (I know I keep way too much crap in the house) and pushed the mouse in, and started drawing a tortoise shell on the cup. My older daughter helped me draw and paint it. Then we painted the front of the mouse green, over the brown layer, that my daughter had painted earlier. We also painted the broken stubs of the handle green, to look like tortoise legs. This is what our art piece looks like.
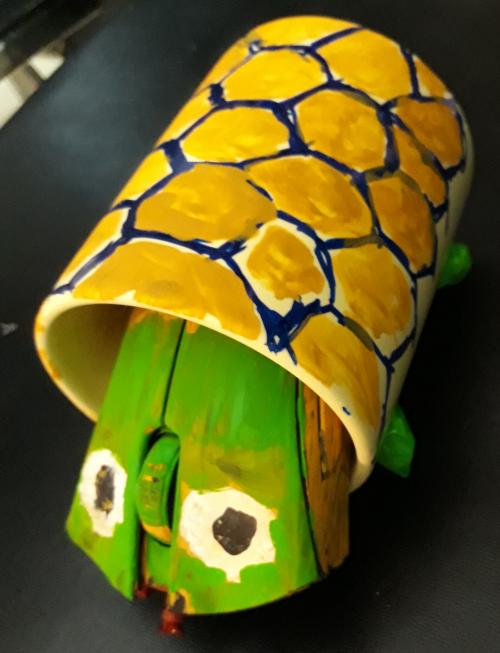
There was a little wire sticking out from the front of the mouse, and we painted it red to look like the tongue of a tortoise.
After this fun and engaging experience, my daughter learned, that there is lots of interesting things you can do with e-waste, and I learned not to jump to conclusions about things, without giving them a fair chance.